WinXPTutor's XP Resources
Windows XP Tips, Illustrations and registry edits
- Homepage |
- Tips Index |
- XP Basics |
- XP SP2 Tips |
- Registry backup |
- CSS - Credits |
Ripping CDs using Windows Media Player 10
Ripping is nothing but the process of storing the CD Audio tracks to the hard drive, in another format (WAV / WMA / MP3 etc). Windows Media Player provides the ability to Rip Audio CD tracks to WMA or MP3 format, without the need to download third-party ripping tools.
To rip Audio CD track(s) using Windows Media Player 10, follow these steps
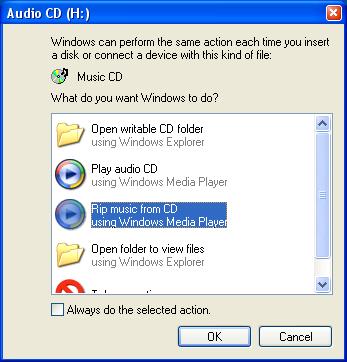
- Insert the Audio CD into the drive. If using Windows XP, the AutoPlay dialog appears (Fig 1).
- Choose Rip from CD - Using Media Player entry from the list and click OK
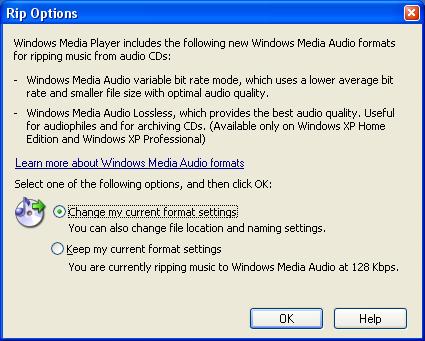
- By default, WMP10 rips audio tracks to WMA file format. To change the rip settings, click Change my current format settings option in the resulting dialog. (Fig 2) Alternately, you can access the rip settings via Tools menu, Options, Rip Music tab.
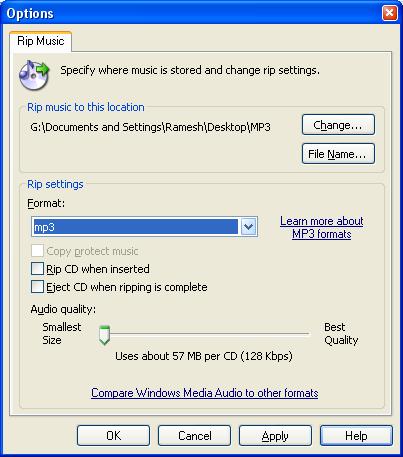
- Configure the Rip settings such as the file format (mp3 or wma), output file location and file name conventions and adjust the audio quality slider per your requirements. (Fig 3)
- Click OK, and ripping will start for all the tracks. While ripping process is going on, you may simply de-select the tracks that you don't want to rip.
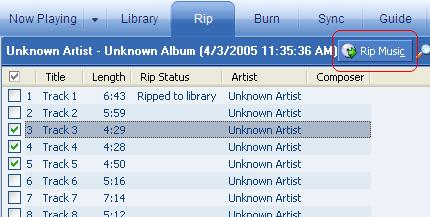
AutoPlay dialog does not appear when you insert a CD?
If the AutoPlay dialog does not appear when you insert a CD, then open Windows Media Player and switch to the Rip tab. Select the tracks that you want to copy and then click the Rip Music button at the top. (Fig 4)